Table of Contents
Raw land is cheap.
Developing it?
That's where the real costs hit.
Land clearing alone can run $1,200 to $12,000+ per acre.
Driveways cost $1,500 on average.
Drainage systems. Fencing. Grading.
It adds up fast.
But here's what most people don't know:
DIY can save you 40-60% on most land improvements.
The catch?
You need to know what you're doing.
The wrong drainage. A poorly built driveway. Skipped permits.
These mistakes compound.
They cost more to fix than doing it right the first time.
This guide breaks down the real costs, proper techniques, and which projects you should absolutely hire out.
Let's get into it.
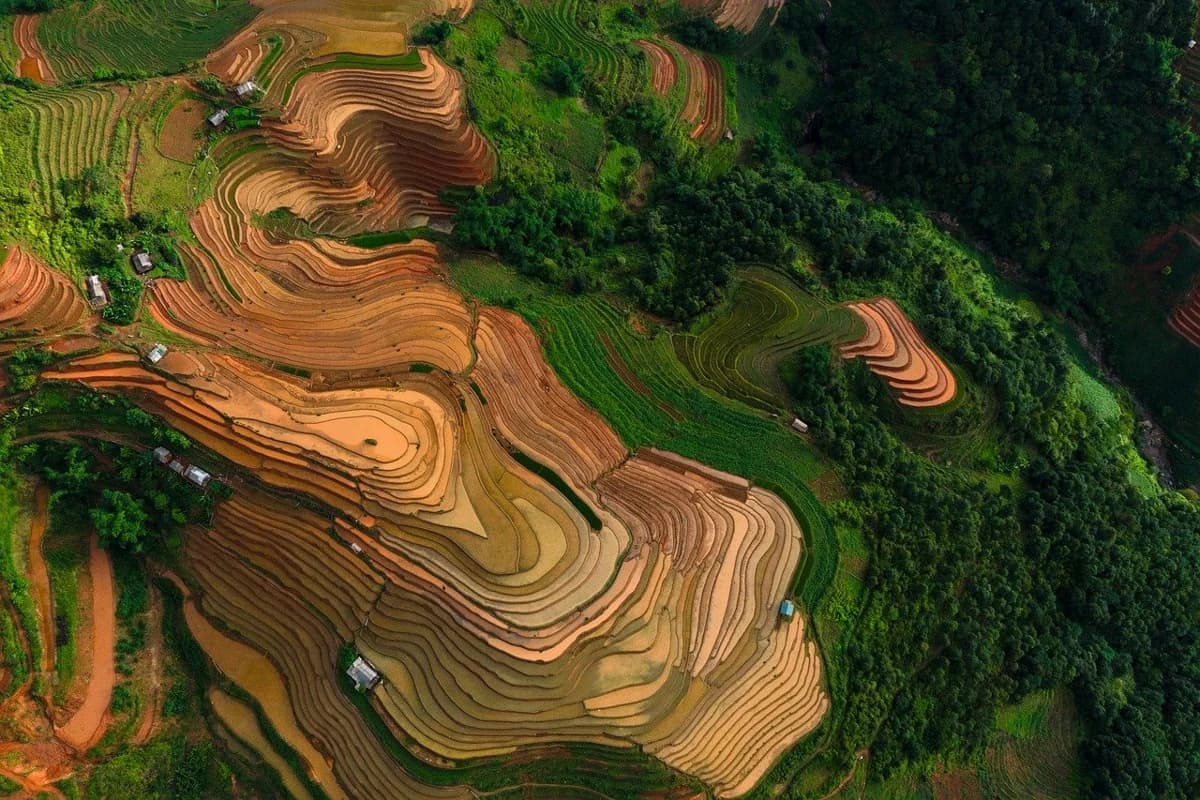
Land Clearing: Costs and Methods
Clearing is usually the first major expense.
And the costs vary wildly.
| Vegetation Type | Cost Per Acre | DIY Feasible? |
|---|---|---|
| Light brush | $1,000-$2,500 | Yes |
| Medium vegetation | $2,500-$4,000 | With equipment |
| Heavy forest | $4,000-$8,500 | Hire out |
| Dense + rocky | $8,000-$12,000+ | Definitely hire out |
For per-square-foot projects: expect $4-$17/sq ft for professional clearing.
What Drives Clearing Costs?
Three factors determine your final bill:
1. Vegetation density
Light brush on a half-acre? Maybe $500-$1,000.
Same size with mature trees? $2,800+.
2. Terrain complexity
Flat land is easy.
Slopes, rocks, and wet areas require specialized equipment.
3. Regional pricing
Texas averages $4,000/acre—about 29% higher than national average.
Why? Caliche deposits and dense cedar/mesquite vegetation.
Tree Removal Specifics
Individual tree removal has its own pricing:
| Tree Height | Removal Cost |
|---|---|
| Under 30 ft | $150-$450 |
| 30-60 ft | $450-$800 |
| 60-80 ft | $800-$1,200 |
| 80+ ft | $1,000-$2,000 |
Stump removal adds $30-$1,600 per stump depending on diameter and wood hardness.
Hardwoods (oak, walnut, maple) cost extra.
DIY Clearing: What's Realistic?
You can realistically clear:
- Brush and undergrowth with hand tools
- Small saplings (under 4" diameter)
- Light vegetation with a chainsaw
You'll need professional equipment for:
- Mature trees
- Stump grinding
- Rock removal
- Large-scale clearing
Pro Tip: Before ANY clearing, call 811 to locate buried utilities. Electrocution from contacting high-voltage lines is the most dangerous hazard in land clearing. Free utility marking is required by law—use it.
Building a Gravel Driveway
A solid driveway is essential for raw land.
Without it, you can't get materials in for construction.
Can't access the property in bad weather.
Can't build anything.
Driveway Cost Breakdown
| Material | Cost Per Sq Ft | Avg Total Cost |
|---|---|---|
| Gravel | $1-$3 | $1,500 |
| Asphalt | $2-$5 | $4,500 |
| Concrete | $5-$6 | $8,000+ |
For raw land, gravel is the smart choice.
Lower cost. Easier installation. Handles rural conditions.
Gravel Driveway Costs by Size
| Configuration | Typical Cost |
|---|---|
| Single-car | $600 |
| Two-car | $1,500 |
| Long rural (300+ ft) | $3,500-$6,000 |
Land prep adds substantially:
- Grading: $100-$3,400
- Resloping: $400-$5,000
- Excavation: $500-$6,000
The Right Way to Build a Gravel Driveway
Skip any of these steps and you'll have potholes within a year.
Step 1: Establish proper slope
Minimum 2% grade (2 inches drop per 100 inches).
Water must flow OFF the driveway, not pool on it.
Step 2: Crown the center
Build the center slightly higher than edges.
Water flows to the sides instead of puddling.
Step 3: Prepare the subbase
Remove topsoil.
Replace with compacted clay or suitable material.
This is non-negotiable.
Step 4: Layer your stone
- Base layer: Large angular stone (crusher run)
- Middle layer: Medium aggregate
- Surface layer: Fine gravel or crushed stone
Step 5: Compact between layers
Rent a plate compactor.
Each layer must be fully compacted before adding the next.
Step 6: Install geotextile fabric
Place between layers.
Prevents fine particles from working into lower layers.
Extends driveway life significantly.
Pro Tip: A topographical survey ($800-$5,500) identifies water flow patterns before you build. This prevents the #1 driveway failure: washouts from water you didn't plan for. Worth every penny on rural property.
Drainage and Erosion Control
Poor drainage destroys properties.
Erosion damages foundations, roads, and land value.
Here's how to address both.
Erosion Control by Slope Grade
| Slope Steepness | Recommended Approach | Cost Range |
|---|---|---|
| Under 33% | Mulch + groundcover | $500-$2,000 |
| 33-50% | Blankets + terracing + plants | $2,000-$5,000 |
| Over 50% | Retaining walls + riprap | $5,000-$20,000+ |
Simple Erosion Solutions
Mulch application
3-4 inches of mulch:
- Reduces rainfall impact
- Slows runoff
- Regulates soil moisture
Cost: Minimal (often free from local tree services).
Erosion control blankets
Biodegradable straw/coconut fiber blankets.
Roll over bare slopes. Stake in place.
Protects while vegetation establishes (6-12 months).
Native groundcover
Dense root systems hold soil permanently.
Low maintenance once established.
Culvert Installation
Culverts direct water under driveways at natural drainage points.
Without them: road washouts.
Materials:
- Double-wall corrugated pipe: $200-$300 per 20-ft section
- Concrete headwalls: $200-$500 each
Installation keys:
- Size appropriately for watershed
- Proper slope (water must flow)
- Erosion protection at inlet/outlet
- Quality compaction around pipe
Safety Warning: Undersized culverts plug with debris and overtop. When in doubt, go bigger. A 24" pipe costs marginally more than 18" but handles significantly more flow.
Retaining Wall Costs
For steep slopes requiring structural solutions:
| Material | Cost Per Linear Foot |
|---|---|
| Concrete blocks | $15-$25 |
| Natural stone | $30-$100 |
| Treated timber | $15-$30 |
Walls over 4 feet typically require permits and engineering.
Pond Construction Basics
Ponds add value, manage stormwater, and provide recreation.
But they're not simple DIY projects.
Pond Cost Breakdown
| Pond Type | Size | Cost Range |
|---|---|---|
| Small garden | 4x6 ft | $1,800-$6,900 |
| Medium decorative | 8x11 ft | $6,200-$15,300 |
| Farm pond | Variable | $3,000-$23,000 |
| Fishing pond | Large | $7,000-$59,000 |
| Swimming pond | Large | $60,000-$100,000+ |
Basic earthmoving: $1.50-$4.00 per cubic yard.
Liner Options
| Liner Type | Cost Per Sq Ft | Durability |
|---|---|---|
| HDPE | $0.30-$0.70 | Good |
| RPE | $0.45-$1.65 | Better |
| EPDM | $0.65-$2.30 | Best |
| Concrete | $64-$114 | Premium |
For small ponds, quality liners add substantial cost but prevent constant leaking headaches.
Site Selection Matters
Before digging:
- Test soil percolation (will water stay?)
- Identify water source (runoff, spring, well)
- Check for utility lines
- Verify permit requirements
Clay soil holds water naturally.
Sandy soil requires liners.
Pro Tip: Pond construction is one project I recommend hiring out. Improperly built ponds fail constantly—liner tears, dam breaches, water quality problems. The $3,000 you save in DIY often becomes $10,000 in repairs. Get it done right.
Fencing and Boundaries
Fencing defines your property and contains livestock.
It's also surprisingly expensive.
Fence Costs by Material
| Material | Cost Per Linear Foot | Best For |
|---|---|---|
| Chain-link | $8-$40 | Security, low maintenance |
| Wood | $10-$35 | Privacy, aesthetics |
| Vinyl | $36-$65 | Longevity, low maintenance |
| Field wire | $3-$8 | Livestock, large areas |
National average: $3,216 for a complete installation.
Typical range: $1,857-$4,756.
Quarter-Acre Property Example
220 linear feet of fencing needed:
- Chain-link: $1,760-$8,800
- Wood privacy: $2,200-$7,700
- Vinyl: $7,920-$14,300
DIY Fencing Realities
Fencing is genuinely DIY-feasible for most people.
Required tools:
- Post hole digger (manual or auger)
- Level
- String line
- Concrete mix
- Basic hand tools
Time investment: 1-3 days for a residential fence.
Key to success: Proper post depth (typically 1/3 of post length underground) and solid concrete footings.
Equipment Rental vs. Hiring Out
The biggest DIY decision: Do I rent equipment or hire professionals?
Equipment Rental Costs
| Equipment | Daily Rate | Weekly Rate |
|---|---|---|
| Mini excavator (2,300-4,200 lb) | $150-$350 | $500-$1,200 |
| Small bulldozer (74-80 HP) | $750-$1,200 | $2,500-$4,000 |
| Skid steer | $200-$400 | $800-$1,500 |
| Plate compactor | $50-$100 | $200-$400 |
| Forestry mulcher | $2,500-$5,500 | N/A |
When to Rent (DIY)
✅ Gravel driveway installation - Skid steer + plate compactor
✅ Light clearing - Skid steer with grapple attachment
✅ Small grading projects - Mini excavator
✅ Post hole digging - Tractor auger attachment
✅ Trenching - Walk-behind trencher
When to Hire Out
❌ Major tree removal - Dangerous, requires expertise
❌ Pond construction - High failure rate for DIY
❌ Structural retaining walls - Engineering required
❌ Septic systems - Permits, inspections, liability
❌ Heavy equipment on slopes - Rollover risk
Safety Warning: Operating heavy equipment without training creates serious injury risk. Equipment rental companies often require demonstrated competence or certified operators. Many offer training for reasonable cost—worth it for safety and better results.
The Hybrid Approach
Smartest strategy: Hire the technical work, DIY the labor-intensive parts.
Example driveway project:
- Hire: Surveyor for grade plan ($500)
- Hire: Excavator for rough grading ($500-$1,000)
- DIY: Spread and compact gravel (saves $1,500+)
- DIY: Install culverts (saves $500+)
Total savings: 40-50% with professional-quality results.
Permits You Actually Need
Skipping permits creates serious problems.
Failed inspections. Stop-work orders. Fines.
Worse: Unpermitted work can kill a future sale.
Permit Requirements by Project
| Project | Permit Usually Required? | Typical Cost |
|---|---|---|
| Land clearing (1+ acre) | Yes (SWPPP) | $200-$500 |
| Driveway | Sometimes | $100-$300 |
| Retaining wall (4+ ft) | Yes | $50-$250 |
| Pond | Often | $100-$500 |
| Septic system | Always | $300-$1,500 |
| Well drilling | Always | $100-$500 |
| Fencing | Rarely | N/A |
Stormwater Permits (SWPPP)
Disturbing 1 acre or more triggers federal Clean Water Act requirements in most states.
You'll need a Storm Water Pollution Prevention Plan (SWPPP) covering:
- Erosion control measures
- Sediment control
- Waste management
- Inspection schedules
Penalties for non-compliance: Thousands of dollars plus project shutdown.
Pre-Construction Soil Testing
Soil testing isn't always required, but it's always smart.
Cost: $1,000-$15,000 depending on complexity.
Basic residential: $1,000-$3,000.
Identifies:
- Contamination
- Unstable ground
- Expansion potential
- Foundation requirements
This investment prevents far more expensive foundation failures later.
Survey Before Building
Land surveys determine:
- Property boundaries
- Topography
- Easements
- Utility locations
Cost: $800-$5,500 depending on property size.
Never build without one.
Boundary disputes and setback violations are expensive problems.
Frequently Asked Questions
What are the most common DIY land improvement projects?
The big five:
- Land clearing (brush removal, small tree cutting)
- Driveway installation (gravel driveways are highly DIY-feasible)
- Fencing (post installation, wire/board attachment)
- Basic drainage (ditches, culverts, erosion blankets)
- Food plots (soil prep, seeding for wildlife)
All are achievable with rental equipment and basic skills.
How much does it cost to clear 1 acre of land?
$1,200-$6,200 per acre for professional clearing.
Breakdown:
- Light brush: $1,000-$2,500
- Medium vegetation: $2,500-$4,000
- Heavy forest: $4,000-$8,500
- Dense + rocky terrain: $8,000-$12,000+
DIY with rental equipment can reduce costs 30-50% for light to medium vegetation.
How do I build a driveway on raw land?
Key steps:
- Establish proper slope (minimum 2% grade)
- Remove topsoil down to stable subgrade
- Install geotextile fabric
- Add base layer of large angular stone
- Compact thoroughly
- Add middle layer, compact again
- Add surface gravel, final compaction
- Install culverts at drainage crossing points
Crown the center higher than edges so water flows off.
What equipment do I need for basic land clearing?
For light clearing:
- Chainsaw (trees under 12" diameter)
- Brush cutter or clearing saw
- Hand tools (axe, loppers, bow saw)
For medium clearing:
- Skid steer with grapple attachment ($200-$400/day rental)
- Mini excavator for stumps ($150-$350/day rental)
For heavy clearing:
- Professional forestry mulcher ($2,500-$5,500/day)
- Bulldozer (hire out)
Do I need permits for land improvements?
Common permit requirements:
- Land clearing (1+ acre): Stormwater permit (SWPPP)
- Driveways: Sometimes required, especially near roads
- Retaining walls (4+ ft): Usually required
- Ponds: Often required
- Septic/wells: Always required
Call your county planning department before starting.
Unpermitted work creates problems for future property sales.
How long do gravel driveways last?
10-15 years with proper construction and maintenance.
Keys to longevity:
- Correct base preparation
- Proper compaction
- Good drainage
- Annual gravel replenishment
- Periodic regrading
Poorly built driveways fail within 1-2 years.
What's the best erosion control for slopes?
Depends on slope steepness:
- Under 33%: Mulch + native groundcover plants
- 33-50%: Erosion blankets + shrubs + terracing
- Over 50%: Retaining walls + riprap + professional engineering
Vegetation provides long-term, low-maintenance protection.
Structural solutions cost more but handle severe slopes.
DIY land improvement is absolutely achievable.
But it requires:
- Realistic cost expectations
- Proper equipment
- Permit compliance
- Knowing when to hire out
Start with high-impact, lower-risk projects.
Driveway. Fencing. Light clearing.
Build skills and confidence.
Then tackle bigger improvements.
Your land—and your budget—will thank you.
Ready to Improve Your Land?
Find the perfect property for your next project with owner financing available.
- Browse all properties including raw land ready for development.
- Need financing? Check our owner financing options.
- Learn about building on vacant land.